We’ve all been there – boards just ain’t cutting like they used to and you know it’s time for a tune up. Well fret not my friends, because if you follow my simple steps for planer blade sharpening , you’ll be slicing through even the gnarliest grain in no time. So grab your stones and pay attention, because when I’m done, you’ll have butter-smooth planing for days!
First things first – you gotta pick your sharpening medium. For me, nothing beats a nice silicon carbide stone. They come in a wide range of grits and last forever if you treat them right. A flat piece of sandpaper would do in a pinch too.
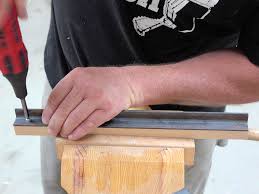
Next up is getting that backside flat and smooth – your blade’s back needs to be dead flat. I gently scrape the whole thing, putting my whole body into it. The heavier pressure really speeds things up. Keep grinding away until it’s a nice smooth finish.
After getting the backside flat, it’s time to tackle the business end – that cutting edge. Now sometimes if things are really dull, I’ll take a few moments to grind in a fresh bevel on my bench grinder.
Using a soft aluminium oxide wheel spinning slowly, I’ll establish about a 25 degree angle. Few light passes per side is all it needs. Trick is not pressing too hard or it’ll burn the steel.
From there switch to the fine work. I like using a honing guide so the angels stay consistent. A couple 120 grit strops to rough out the old edge profile.
Then it’s on to the finer 220 and 400 grit stones. Just a few strokes per side raises a tiny burr. Feeling that sharp little wire is when ya know it’s time!
Now here’s the pro tip – I like to strop the burr right off on the backside of the stone. Only takes a few swipes and that edge is primed for shaving.
Do a test run and you’ll see buttah-smooth curls peeling away. Can’t ask for better results from just a few quick minutes of sharpening!
And that’s it! Simple as can be once you get the rhythm down. Takes me like 10 minutes tops to fully restore an edge. Your planner will cruise through even the gnarliest stock without a complaint. With some regular tune-ups like this, your planner will cut for years to come.